Once upon a time, I had a surfeit of color negative film: 2-5 rolls each of multiple 100, 200, and 400 variants from multiple manufacturers/re-rollers, but after shooting film almost exclusively for more than a year, that supply dwindled to dangerously low levels, and as of January 1, 2016 I had one roll each of Lomo Color 100, Porta 160, and Porta 400, plus a couple of rolls each of some discontinued films (Kono Kolorit 400, Lomography Cine 200, Rollei Digibase CN200 Pro) that I wanted to save…
It didn’t take me long to shoot through the readily available, mass-produced stuff.
My first thought was to put in a film order from B&H, but their Labor policies give me pause, and I don’t think I’ll be contributing any of my hard earned money to their business until they manage to get their racist hiring and promotion practices straightened out.
But I digress.
One day, while listening to the Film Photography Podcast, I got a bit of a wild hair and decided to check eBay for some expired film, and after maybe a half hour of research ordered up 6 rolls Kodak HD 400 (expired 11/2015) and 5 rolls of Kodak ProImage 100 (expired 11/2015).
The film came in just in time, and I loaded a roll of the HD400 into the Ricoh 35 ZF, thinking that between the light leaks on the Ricoh and the unknown condition of the HD400, I might get some interesting results…
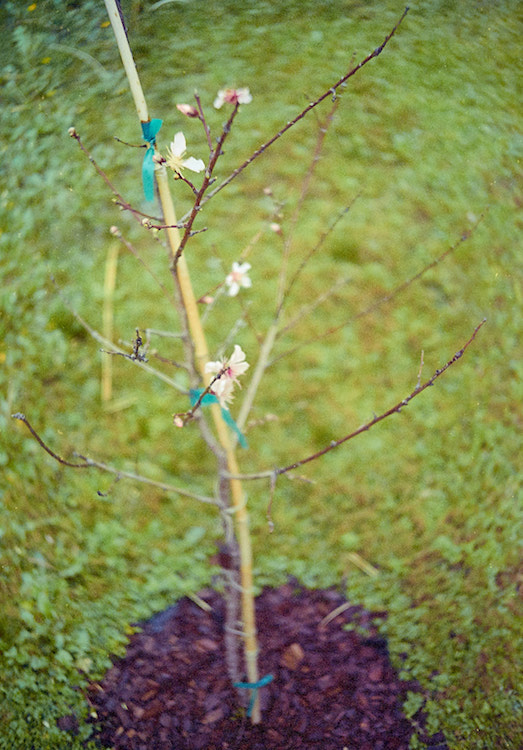
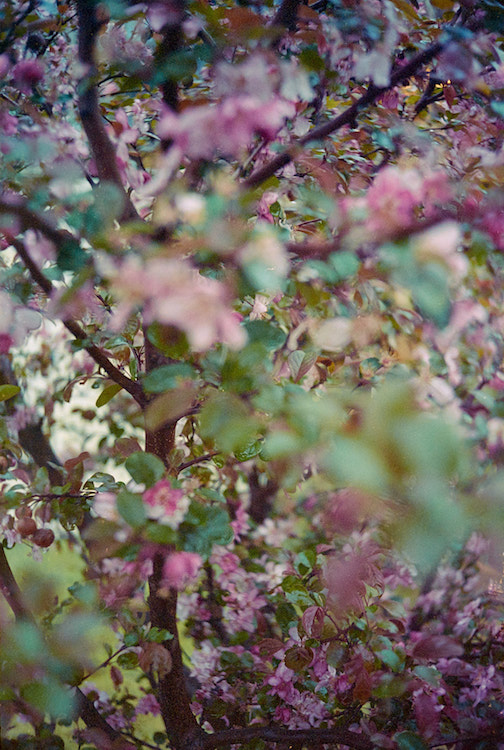
In all the Ricoh 35 ZF shooting I’ve done, I don’t think I ever noticed the swirly bokeh effect before, at least not as swirly as the shot of the little peach tree. Wow. Take that, Petzval! The swirl wasn’t as obvious in other shots, but did make an appearance.

I assure you that the mulch was not arranged into a swirly pattern, but apparently the characteristics of the lens on the 35ZF. The 40mm f/2.8 Rikenon lens is a tessera-type, four element affair, and up close, wide open, that lens type is capable of the swirly effect, though it’s more well controlled than simpler lenses, and doesn’t much exist at higher apertures and with less distance between subject and background.
I shot through the roll fairly quickly and kept the camera in the dark as much as possible when not actively shooting to minimize light leaks, even though I was hoping to get some fun effects between the light leaks and the old film.
Speaking of old film, the 6 rolls of HD 400, in 2 3-packs, were probably hanging out on a store shelf somewhere: the boxes showed no evidence that they’d been in a refrigerator. (The box of Pro Image 100 looked to have absorbed some moisture in its day, and I surmise this was due to spending a good amount of time in a refrigerator.) When first processing the film, I didn’t notice much in the way of color shifts, but when I started writing up this post, I noticed the colors were way off, so I recalibrated the monitors and revisited the levels in all of the pictures. Here’s a before and after of the mini roses…
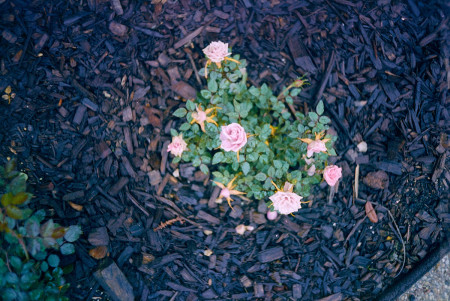

Admittedly, the roses are a bit pinker in person than they are in the after-calibration image, but the mulch in the floor beds is a dark brown, not a blue/black, and the green in the leaves is much closer to correct.
In revising the edits, though, I noticed that I needed to pull the blue and green levels way back, and so I have a suspicion that the HD 400 went a bit blue in its old age. I’m not positive, though, since I have no idea what it would look like developed/printed commercially, with Kodak-supplied curves or whatever the 1 hour machines use to render the colors… I guess “render” is the wrong word, since I think those old machines like Ritz Camera had back in the 1990s when Dad worked there employ a largely analog process, though I distinctly remember that it was possible to shift the white balance and tweak the exposure during the printing process: there was a little window in the printing machine where you could see the negative and apply some adjustments.
I have no idea how any of that worked, but I’d like to find a way to get the colors from my home-developed film close to what the film was made to render, rather than adjusting RGB levels until I find something I like. With my current set-up, I tend to get relevantly similar results, regardless of film stock. The only differences I notice are in the ease of getting to a something I’m happy with, and it takes awhile with the HD 400.
Anyway, the 35 ZF is plenty sharp when you give it the opportunity to be, but when you shove it lens-first into some tall grasses and trip the shutter, you never know what’s going to come out…
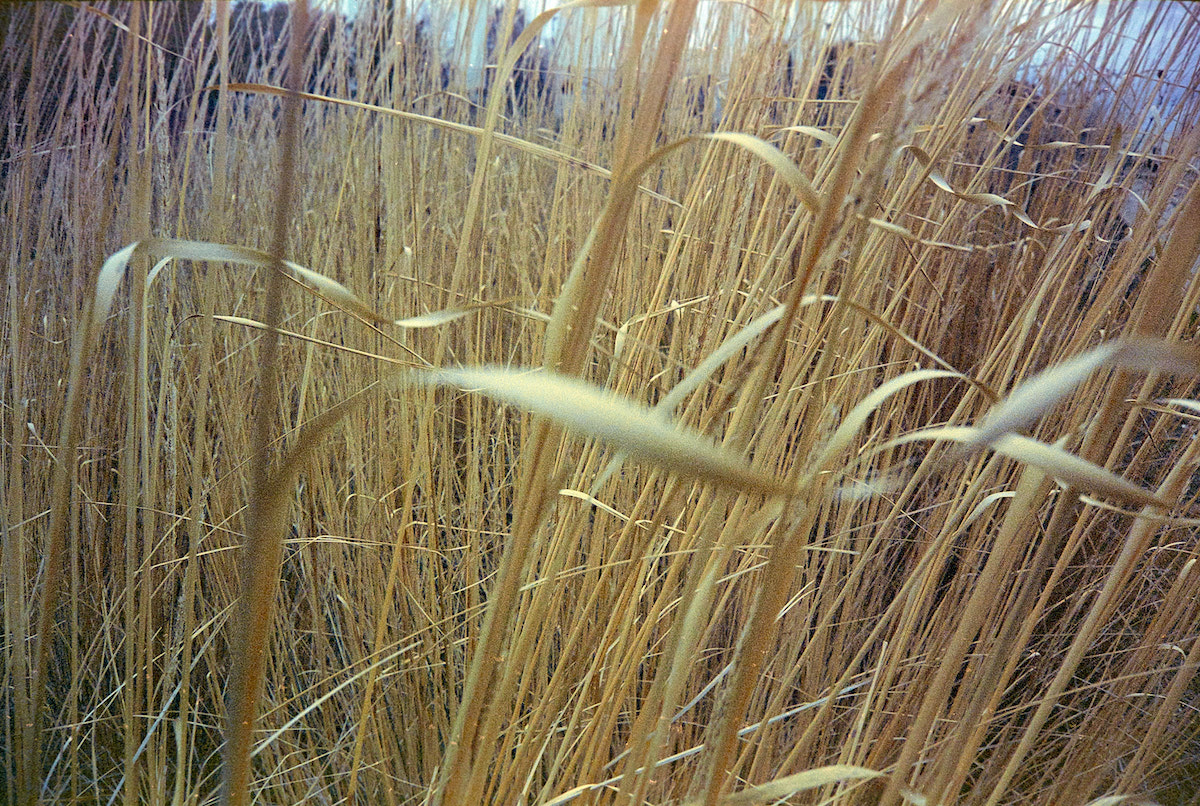
Here’s a 100% crop of the top right corner of the shot above…
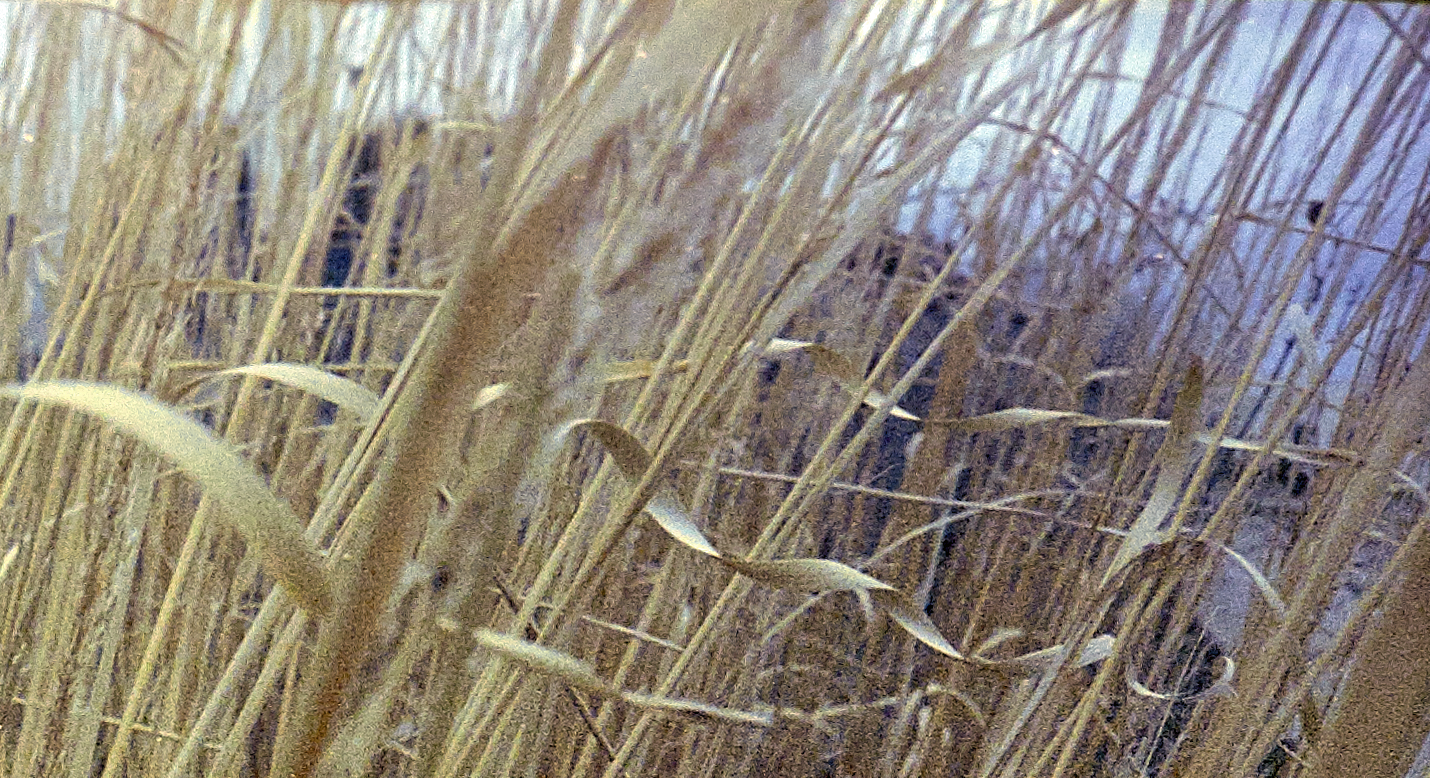
So this roll came out a bit grainy, and I was fairly disappointed with it. Sure, 400 speed films are grainy, but that seems a bit excessive.
I was really disappointed with the first roll, largely because of the grain, but I think it was grainier than usual because this was the first roll to go through a fresh batch of chemicals. (I’ve since shot another roll, and it’s grainy too, but the grain is controlled much better than this roll, so I suspect it’s the chemicals.)
Other than the grain, though, and the lateral curve in dried negatives that seems characteristic of Kodak films, I’m liking the HD 400. I might try to find some more, once I finish off the 3 or 4 rolls I have left, but at ~$22 for 6 rolls of 24 exposures each, it’s not much cheaper than Lomography Color 400, and the Lomo film is far easier to scan…
So if you find yourself in need of some decent 400 speed color negative film, give the HD 400 a try. It’s not bad. And especially if you find some for cheaper than $3.50/roll, shipped, jump on it.