So we have light. But light, while necessary, is insufficient: other elements go into making a photograph.
Regardless of the importance and primacy of light, a human being with some amount of technical skill and an idea or desire to capture a scene is equally necessary, and other equipment, while necessary, can vary widely in technical sophistication, from the most rudimentary pinhole design to the newest digital body, without having much of an impact on the final result as do light and the photographer.
The photographer decides what objects to photograph and when to photograph them. Such decisions can be carefully considered (as in the case of, say, a fancy HDR image by Trey Ratcliff) or largely spontaneous (as in snapshots of a birthday party or somesuch), but they are decided upon. I frame Olive stretched out on the floor in a fabulous yawning pose rather than just the floor, because I want to shoot a photo of Olive and not the floor.
Under this standard, anyone with the ability to release a shutter can be considered a photographer. And I mean to put it this way, since photography is an activity that is open to anyone with an image-capturing device and the will to imprint a moment on film or encode it in 1s and 0s.
Professionals may disagree with me on this point, and they are welcome to do so. I have no desire to belittle their training, experience, and vision, all honed through years of labor and practice. But it is true that, by definition, anyone who makes a photograph is a photographer.
Training, vision, and practice, however, matter a great deal. And this is what distinguishes me from someone like Mr. Ratcliff: training, vision, practice, and, lets not forget, making money from photography. Indeed, I am even further removed from Mr. Ratcliff and other professional photographers than most amateur and hobbyist photographers, given that I can’t seem to manage to go out shooting more than a couple of times a month, and therefore have difficulty improving my photography in any measurable sense.
What makes a good photographer, though, is not so much her technical ability, but her photographic vision. Or, should I say, these two go hand in hand.
I can have all the vision, all the ideas, plans, whatever, that I want, but if I don’t know anything about apertures, shutter speeds, ISOs, and etc. I’ll never be able to take that vision to fruition.
And if I have no vision, all the technical ability in the universe can’t make a good photograph.
But this is all beside the point.
The photographer is integral to the photograph precisely because the photographer decides what object(s) will be photographed and what moment will be captured. This relationship is integral to the photographic process, and there can be no photography without a photographer.
This is, admittedly, a strange claim, and I think I should lay out a few counter-examples to help clarify (and, perhaps, to disprove the claim entirely…).
Example 1: the security camera.
Security cameras are with us constantly. There is one pointing at me right now as I write. (I’m doing a bit of writing at work, and they like to keep an eye on us…) These cameras record everything that passes in front of them without any direct intervention from a human, without an operator present to trip the shutter.
So where is the photographer?
Now, granted, security videos are not generally thought of as being part of photography, but I think most video operates in a manner that’s almost identical to photography, and I’m sure that video and photography require the same elements (light, an operator, a subject, a lens, and a recording device) to exist.
But where is the photographer?
The photographer in this case, I think, would be the person (or persons) who installs, aims, and sets up the camera to record at specific times or under specific circumstances. Just like I point the camera at Olive, the grocery store’s owner points his surveillance equipment at the cash registers, and ensures that the light is sufficient and camera aligned properly to capture theft by employees.
Example 2: The CatCam
Here again there is no photographer, per se. There is the human that straps the camera to the cat, and the cat who likely despises having the camera attached to it, but goes on about its business of sleeping, napping, dozing, and etc. regardless. But just as in the case of the security camera, there is someone who makes a decision to take photographs of the cat, from the cat’s perspective, at specific intervals throughout the day.
And so, again, a photographer exists, and while not directly involved in clicking the shutter, is nonetheless integral to the production of any photographs captured with the Cat Cam.
But I have a final example that may give the lie to my entire claim, here.
Example 3: The Beautiful Accident
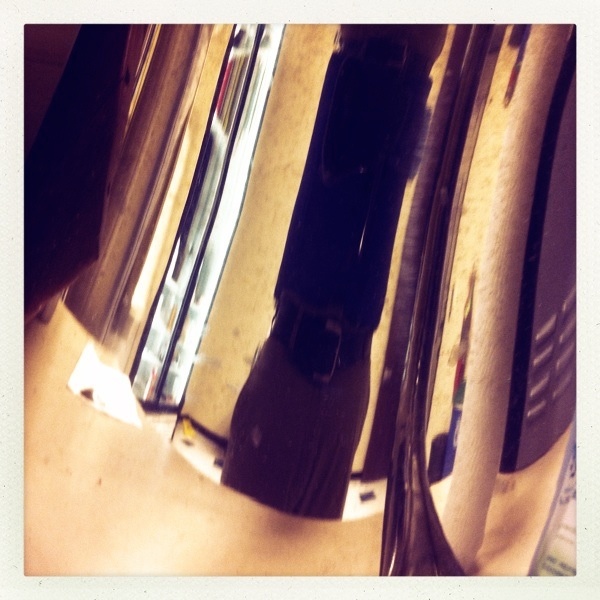
When I arrived home from the Farmer’s Market Photowalk, I found this:

I have no memory of clicking the shutter, and am sure I would’ve focused on something first (as the focus was, at that point, tied to the half-press of the shutter release). The camera must have bumped against my leg or something and somehow tripped the shutter, but I don’t know how that could be, since I use a BlackRapid strap and the camera hangs upside down. I could’ve been holding it, walking around and looking for something to shoot, but then how did the shutter trip without my knowledge or will?
In any case, this is a beautiful image, to my eye. Great color, good light, brilliant bokeh, decent composition, etc. (I did do a bit of cropping and straightening, and bumped the contrast and saturation a bit, but that’s it.) There was no photographer involved.
Sure, I took the camera with me that day, and, sure, I took ~250 pictures. But I didn’t take this one, or don’t remember taking it.
So perhaps a photographer is not all that integral?
Well, I did take the camera to the Dallas Farmer’s Market, and I was holding it when it took this picture, and I did, upon viewing the picture, decide that I liked it enough to play around with the color and cropping to make it a bit better, and there, perhaps, is where the photographer (if I can be called that) entered the picture. Or, more properly, there’s where the artist entered.
Without my eye, my ability to frame a scene, my recognition of pleasant patterns and shapes, this photo would’ve been consigned to the recycle bin. But the fact remains that there was no intervention from me in the making of this picture. It was only the light, the subject, the lens and the camera, and in this case they worked together just fine without any intervention from me.
And if, as in the case of the security camera and the CatCam, the photographer can be necessary and participate only prior to the taking of any pictures, couldn’t the photographer also only participate only after the shutter clicks?
This, perhaps, is the answer… perhaps.
Another approach would be to say that the image above, despite being created with a camera, is not a photograph, per se, but an artwork, and therefore required only someone with imagination and will to come along and proclaim it as art. And this is the same as saying the photographer can appear only after the photo gets captured.
In any case, this is a limit event: very few photographs are taken by accident, or by magic. And if the security camera can ‘accidentally’ capture a robbery, if the CatCam can capture a day-in-the-life of Olive, and if the results can be considered photographs, then maybe the act of deciding to take the camera for a walk can also be all that is necessary to create a photograph.
So above, I said that the photographer provides the vision, technical knowledge, and decision-making to the photographic process, but this is not necessarily the case. Technical ability, vision, and etc. can help a human being create better photographs more often than someone without such qualities, but these are not absolutely necessary, and beautiful work can come out of even the most random of occurrences, camera malfunctions, total accidents, etc.
While a photographer is a necessary part of a photograph, she is not sufficient.
That said, while accidents happen, an amount of training and vision is resolutely needed for repeatability. If I know nothing about the camera, I can’t recreate the accidental image, and this ability is, perhaps, what separates the photographer from the snap-shooter.
So, I guess this means there are two positions for a human to take in the creation of a photograph.
- The snap-shooter, who acts before or after the shutter clicks, and allows the camera to do the heavy lifting. The big box store security chief points surveillance cameras at the cash registers to guard against employee theft (of money, time, or whatever); I set up a simple camera to take pictures every three minutes, strap it to Olive, and go about my activities, secure in the knowledge that a bunch of pictures will await my return. Or, alternately, I return from a photowalk and discover a picture that I didn’t know existed, realize its potential, and crop, resize, color-correct, and otherwise enhance it.
- The photographer, who understands some things about light and composition, and has knowledge of the capabilities of the equipment, sees a scene, points the camera, frames the subject, clicks the shutter with intent and with a relatively accurate idea of the outcome, then processes and presents the finished photograph, and has the ability to reshoot the scene innumerable times with the same results.
So I’ll go ahead and modify my claim.
A photograph is made by the interaction of 5 different elements. Light, the Photographer (or Snap-Shootist), the Subject, the Lens, and the Camera. Some of these are more important than others, but all are required to create a photograph.